
Screenshots Made Simple: Master the Snipping Tool
A 10-Minute Micro-Course with Skits, Your Shared Knowledge Sidekick
Learn how to capture, annotate, and share screenshots on Windows using the Snipping Tool and the Win+Shift+S shortcut. Never email your entire screen again!
Welcome! Let's Master Screenshots

Ever needed to show someone exactly what's on your screen? Maybe an error message, a receipt, or something funny you found online? Screenshots are one of those everyday skills that save you tons of time once you know how. And Windows has a built-in tool that makes it ridiculously easy!
But first — what's your name?
The One Shortcut You Need to Know

Forget Print Screen. Forget searching for apps. There's one keyboard shortcut that instantly lets you capture any part of your screen, and it works on Windows 10 and Windows 11.
The Magic Shortcut
Win + Shift + S
Hold all three keys at the same time
What Happens When You Press It

Where's the Win key? It's the key with the Windows logo on it, usually between Ctrl and Alt on the bottom-left of your keyboard. Some people call it the "Start" key or the "Windows" key.
Try It Right Now!
Seriously — press Win+Shift+S right now. Your screen will dim. Draw a rectangle around anything. Then open an email or document and press Ctrl+V to paste it. That's it. You just took a screenshot!
Bonus: A notification will pop up in the bottom-right corner after you capture. Click it to open the full Snipping Tool editor where you can annotate and save your screenshot. More on that in a minute!
Four Ways to Capture Your Screen

When you press Win+Shift+S, you'll see four icons in the toolbar at the top of your screen. Each one captures your screen in a different way. Let me show you what they do.
Rectangle Snip (Default)
Click and drag to draw a rectangle around what you want. This is the one you'll use 90% of the time.
Best for: Error messages, sections of a webpage, parts of a document, a specific image or chart
Freeform Snip
Draw any shape with your mouse. The capture follows your drawing. It's like using scissors.
Best for: Capturing irregular shapes, circling something specific, creative screenshots
Window Snip
Click on any open window and it captures just that window — perfectly cropped, no extra stuff around it.
Best for: Capturing an entire program window, a dialog box, or a pop-up message
Full Screen Snip
Captures everything on your entire screen, including the taskbar and all open windows.
Best for: Showing your full desktop layout, capturing everything visible at once
Skits' Recommendation
Start with Rectangle Snip. It's the default, it's the most useful, and it handles almost everything. Once you're comfortable with that, try the others when the situation calls for it.
Match the Snip Mode!

Click a snip mode on the left, then click its matching description on the right. Match all four correctly to move on!
Match Each Mode to What It Does
Snip Modes
What It Does
Annotate: Mark Up Your Screenshots
After you capture a screenshot, the Snipping Tool lets you draw on it, highlight things, and add notes before saving or sharing. This is where screenshots become really powerful.
How to Open the Editor
After you take a screenshot with Win+Shift+S, a notification pops up in the bottom-right corner of your screen. Click that notification to open the Snipping Tool editor.

Missed the notification? You can also open the Snipping Tool from the Start menu (search for "Snipping Tool") and your most recent capture will be there.
The Annotation Toolbar
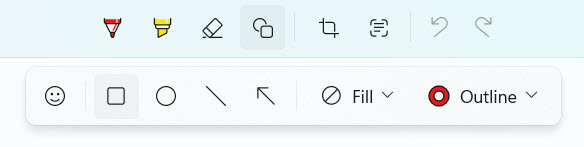
Ballpoint Pen
Draw freehand lines in different colors. Great for circling things or drawing arrows to point something out.
Highlighter
Transparent yellow (or other color) highlighting. Perfect for drawing attention to specific text or buttons on screen.
Eraser
Remove any annotations you've made. Doesn't erase the screenshot itself — just your markings.
Ruler & Protractor
Draw perfectly straight lines or measure angles. Most people won't need these, but they're there if you do.
Crop
Trim your screenshot down even further after capture. Captured a little too much? Crop it tighter.
Want Hands-On Help With Screenshots?
SKTS can show you in person how to use the Snipping Tool, set up shortcuts, and even create quick reference cards for your desk. It takes about 15 minutes and you'll be a screenshot pro.
Save, Copy, and Share Like a Pro

There are several ways to use your screenshot depending on what you need. Let me walk you through the most common ones.
Three Ways to Use Your Screenshot
Option 1: Paste It Directly (Fastest)
Right after taking a screenshot, it's automatically on your clipboard. Just press Ctrl+V to paste it into:
- An email (Outlook, Gmail, etc.)
- A Word or Google document
- A chat message (Teams, Facebook Messenger, etc.)
- Anywhere that accepts images
This is the quickest method — capture and paste in under 5 seconds.
Option 2: Save as a File
In the Snipping Tool editor, click the Save icon (floppy disk) or press Ctrl+S. Choose where to save it and pick a format:
- PNG — Best quality, good for most uses (default)
- JPG — Smaller file size, good for emailing
Great when you need to attach a file, keep a record, or organize screenshots in a folder.


Option 3: Share Directly
In the Snipping Tool editor, click the Share icon. Windows will show you sharing options like email, nearby devices, or other apps.
Useful when you want to send it to someone quickly without saving a file first.
Real-World Tips
- Emailing tech support? Take the screenshot, open your email, paste with Ctrl+V. Done in 10 seconds.
- Saving a receipt? Capture it, save as PNG to a "Receipts" folder. You'll thank yourself later.
- Showing a coworker something? Capture, paste directly into a chat message. No file needed.
- Documenting an error? Capture, annotate with a note about what you were doing, save the file.
Pro Tip: Screenshot Folder
Create a folder called "Screenshots" in your Documents or on your Desktop. When you save screenshots there, they're always easy to find. Name them something useful like "error-message-march-15" instead of the default filename.
Put the Steps in Order!
You just bought something online and want to save a screenshot of your order confirmation to a "Receipts" folder. Click the steps below in the correct order to complete the workflow!
Click Each Step in the Right Order

You're a Screenshot Pro!

You just learned Win+Shift+S, all four capture modes, how to annotate your screenshots, and how to save and share them like you've been doing it for years. That's a seriously useful skill. No more blurry phone photos of your screen. You're a pro now.
Next time you need to show someone what's on your screen, you'll capture it in seconds. Now go screenshot something!
Opens a print-ready version you can save as PDF or print directly
Want More Tech Tips Like This?
SKTS teaches everyday tech skills to seniors and small businesses in Winchester, VA. Whether it's screenshots, email, backups, or security — we make it simple.
Let SKTS Help You Learn More
Call Jerry at 540.303.2410
One-on-one training • Group sessions • Phone support • In-person help